
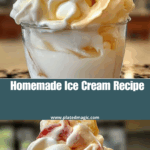
This Homemade Ice Cream recipe offers a creamy, no-churn dessert you can make with just a few ingredients and basic kitchen tools—no ice cream machine required. It’s a simple yet luxurious treat with rich vanilla flavor and a smooth, velvety texture, perfect for scooping into cones or bowls.
Why You’ll Love This Recipe
- No Ice Cream Maker Needed: Easily made using a blender or food processor and ice cube trays.
- Minimal Ingredients: Just four common ingredients and no complex steps.
- Rich and Creamy Texture: The combination of heavy cream and condensed milk creates a luscious consistency.
- Customizable: Add mix-ins like chocolate chips, fruit, or cookie crumbles.
- Family-Friendly: A fun, hands-on recipe that kids and adults will enjoy making and eating.
Ingredients
(Tip: You can find the complete list of ingredients and their measurements in the recipe card below.)
- 2 cups heavy whipping cream (500g)
- 9 oz condensed milk (250g)
- 2 tsp vanilla extract
- 2 to 3 tbsp milk (for blending)
Directions
Mix the Base:
- In a mixing bowl, combine the heavy whipping cream, condensed milk, and vanilla extract.
- Stir until the mixture is smooth and creamy. Do not whip or overbeat.
Freeze:
- Pour the mixture into ice cube molds.
- Freeze overnight, or for at least 8 hours, until the cubes are fully solid.
Blend:
- Transfer the frozen cubes into a food processor or high-powered blender.
- Add 1–2 tablespoons of milk and blend until smooth. Add more milk as needed to reach your desired texture.
Serve:
- Once blended to a soft-serve consistency, pipe or scoop the ice cream into cones or bowls.
- Serve immediately or freeze for an additional hour for a firmer texture.
Servings and Timing
- Servings: 4
- Preparation Time: 10 minutes
- Freezing Time: Overnight (8–10 hours)
- Total Time: About 8–10 hours
Variations
- Chocolate Chip: Fold in mini chocolate chips before freezing the mixture.
- Strawberry Swirl: Add spoonfuls of strawberry jam to the blender for a fruity swirl.
- Cookies & Cream: Mix in crushed chocolate sandwich cookies after blending.
- Mint Chocolate: Add a drop of peppermint extract and chopped dark chocolate for a refreshing twist.
- Dairy-Free Option: Use coconut cream and dairy-free condensed milk as substitutes.
Storage/Reheating
- Storage: Store leftover ice cream in an airtight, freezer-safe container. It will keep for up to 1 week.
- Re-Freezing: If re-freezing after serving, allow it to soften slightly at room temperature before scooping.
- Reheating: Not applicable—this is a frozen dessert best enjoyed cold.
FAQs
Can I whip the cream first for a fluffier texture?
For this method, it’s best not to whip the cream beforehand. The blender will incorporate air as it blends the frozen cubes.
What if I don’t have ice cube molds?
You can use any small silicone molds or freeze the mixture in a shallow tray and break it into chunks before blending.
Can I use evaporated milk instead of condensed milk?
No, condensed milk is sweetened and provides the necessary texture and sweetness. Evaporated milk won’t yield the same results.
Is this ice cream very sweet?
It is moderately sweet due to the condensed milk. You can adjust sweetness by using slightly less condensed milk if desired.
Can I refreeze the blended ice cream?
Yes, but it may harden slightly. Let it sit at room temperature for 5–10 minutes before serving again.
Can I add flavorings other than vanilla?
Absolutely—try almond extract, cocoa powder, coffee, or fruit purees.
What’s the texture like compared to churned ice cream?
It’s creamy and smooth but may be slightly denser than churned ice cream. Blending well helps achieve a fluffy consistency.
Can I use low-fat cream?
Full-fat cream is recommended for best results. Low-fat versions may lead to an icy or less creamy texture.
How long should I blend the cubes?
Blend until smooth and thick, scraping down the sides if needed—usually 1–2 minutes depending on your appliance.
What’s the best way to serve it?
Serve in cones, bowls, or use it as a base for sundaes with toppings like sprinkles, chocolate sauce, or fresh fruit.
Conclusion
This Homemade Ice Cream recipe is an easy, fun way to enjoy rich, creamy ice cream without an ice cream maker. With just a few ingredients and a simple process, it’s perfect for spontaneous cravings or family-friendly dessert nights. Customize it to your taste and enjoy every scoop of this delightful frozen treat.
Print
Homemade Ice Cream Recipe
- Total Time: 0 hours
- Yield: 4servings
Description
This Homemade Ice Cream Recipe is a simple, no-churn method using heavy cream, condensed milk, and vanilla extract to create a rich and creamy dessert—without an ice cream maker! With just a few ingredients and a blender, you can enjoy smooth, customizable ice cream in cones or bowls any time of year.
Ingredients
-
2 cups heavy whipping cream (500g)
-
9 oz condensed milk (250g)
-
2 tsp vanilla extract
-
2-3 tbsp milk (for blending)
Instructions
. Prepare the Base:
-
In a mixing bowl, combine heavy cream, condensed milk, and vanilla extract. Mix gently until smooth—do not whip.
2. Freeze the Base:
-
Pour the mixture into an ice cube mold or silicone tray.
-
Freeze overnight until completely solid.
3. Blend the Ice Cream:
-
Pop the frozen cubes into a high-powered blender or food processor.
-
Add 1–2 tbsp milk and blend until creamy. Add more milk as needed for smoother consistency.
4. Serve:
-
Pipe or scoop into ice cream cones or bowls.
-
Notes
-
Customize with chocolate chips, crushed cookies, or fruit puree during the blending step.
-
Use flavored extracts (e.g., mint, almond) for variety.
-
Store leftovers in an airtight container in the freezer.
- Prep Time: 10 minutes
- Cook Time: Overnight (8–10 hours)
- Category: Dessert
- Method: No-Churn, Freezing
- Cuisine: American