

Gluten-Free Mini Cheesecakes are rich, creamy, and perfectly portioned for individual indulgence. Built on a buttery gluten-free graham cracker crust and topped with a silky cheesecake filling, these elegant treats are as impressive as they are easy to prepare. Whether you’re hosting a gathering or seeking a make-ahead dessert, these mini cheesecakes deliver timeless flavor in a gluten-free format.
Why You’ll Love This Recipe
These mini cheesecakes offer everything you love about traditional cheesecake—velvety texture, tangy richness, and irresistible sweetness—without the gluten. They’re conveniently portioned for serving, and their versatility means you can top them with anything from fresh fruit to decadent sauces. The recipe is straightforward, bakes quickly, and sets beautifully after chilling, making it ideal for both everyday enjoyment and special occasions.
Ingredients
(Tip: You can find the complete list of ingredients and their measurements in the recipe card below.)
For the Crust:
1¼ cups gluten-free graham cracker crumbs (such as Schär Honeygrams)
2 tablespoons light brown sugar, packed
5 tablespoons butter, melted
For the Cheesecake Filling:
2 (8 oz) packages cream cheese, room temperature
½ cup sour cream, room temperature
1 large egg, room temperature
½ cup granulated sugar
1 teaspoon vanilla extract
1 teaspoon lemon juice
Directions
Make the Crust:
Preheat your oven to 350°F (175°C). Line a standard 12-cup muffin tin with paper cupcake liners.
Crush gluten-free graham crackers in a food processor or place them in a sealed plastic bag and crush with a rolling pin.
In a medium bowl, mix the graham cracker crumbs with brown sugar and melted butter until evenly moistened.
Spoon approximately 1½ tablespoons of the crumb mixture into each cupcake liner and press down firmly to form the crust. Set aside.
Make the Cheesecake Filling:
In a large mixing bowl, beat the cream cheese with an electric mixer on medium speed for 1–2 minutes until fluffy and smooth.
Add the sour cream, egg, granulated sugar, vanilla extract, and lemon juice. Beat until the mixture is smooth and well combined, scraping the sides of the bowl as needed.
Bake the Cheesecakes:
Evenly divide the cheesecake filling among the 12 muffin cups, filling each almost to the top.
Bake for 20 minutes, or until the cheesecakes are slightly puffed and just starting to brown at the edges.
Remove from the oven and allow them to cool completely in the pan.
Once cooled, refrigerate for at least 3 hours or overnight until fully set.
Serve:
Gently peel off the cupcake liners and serve chilled.
Customize with your favorite toppings.
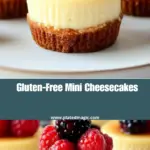
Topping Ideas:
-
Fresh berries
-
Lemon curd
-
Whipped cream
-
Cherry pie filling
-
Chocolate or caramel sauce
Servings and timing
Prep Time: 10 minutes
Cook Time: 20 minutes
Chill Time: 3 hours
Total Time: 3 hours 30 minutes
Yield: 12 mini cheesecakes
Variations
-
Dairy-Free Option: Use dairy-free cream cheese, sour cream, and butter for a lactose-free version.
-
Chocolate Swirl: Add a few teaspoons of melted chocolate into the filling before baking for a marbled effect.
-
Spiced Crust: Mix a pinch of cinnamon or nutmeg into the crust for added warmth and flavor.
-
Coconut Topping: Garnish with toasted coconut flakes for a tropical twist.
-
Mini Pumpkin Cheesecakes: Add ½ cup pumpkin purée and a pinch of pumpkin spice to the filling for a seasonal alternative.
Storage/Reheating
Storage:
Keep the mini cheesecakes in an airtight container in the refrigerator for up to 5 days.
Freezing:
Wrap each cheesecake individually in plastic wrap and store in a freezer-safe container for up to 2 months. Thaw in the refrigerator before serving.
Reheating:
These cheesecakes are best served cold or at room temperature. Reheating is not recommended, as it may alter the texture.
FAQs
Are these mini cheesecakes completely gluten-free?
Yes, as long as certified gluten-free graham crackers are used, this recipe is entirely gluten-free.
Can I make these without cupcake liners?
Cupcake liners are recommended for easy removal, but you can also use a well-greased silicone muffin pan.
Can I use a different type of gluten-free crust?
Yes, you can substitute with crushed gluten-free cookies such as digestive biscuits or shortbread.
Can I double the recipe?
Yes, double all ingredients and bake in two muffin tins or in batches.
Why is my cheesecake filling lumpy?
Ensure all ingredients are at room temperature and beat until smooth to avoid lumps.
How do I keep the cheesecakes from cracking?
Cracking is minimal in mini cheesecakes, but overbaking can cause it. Bake just until puffed, and cool slowly.
Can I make this recipe egg-free?
You may use a commercial egg replacer, though texture may vary slightly.
What’s the best way to crush graham crackers?
A food processor is easiest, but placing them in a zip-top bag and crushing with a rolling pin also works well.
Can I use full-size muffin tins or mini tins?
This recipe is designed for standard muffin tins. You can use mini tins and reduce the baking time by a few minutes.
Can I prepare these in advance?
Yes, they are an excellent make-ahead dessert and taste even better after chilling overnight.
Conclusion
Gluten-Free Mini Cheesecakes are a creamy, delicious treat that’s easy to prepare and even easier to enjoy. With their buttery graham cracker crust, smooth filling, and endless topping possibilities, these cheesecakes are the perfect dessert for any gluten-free gathering or everyday indulgence. Make them ahead, chill until ready, and serve with your favorite garnish for a delightful, crowd-pleasing finish
Print
Gluten-Free Mini Cheesecakes
- Total Time: 3 hours 30 minutes
- Yield: 12 mini cheesecakes
- Diet: Gluten Free
Description
These Gluten-Free Mini Cheesecakes are rich, creamy, and perfect for parties or portion-controlled treats. With a buttery graham cracker crust and a smooth vanilla cheesecake filling, they’re easy to make and endlessly customizable with your favorite toppings. Keywords: gluten-free mini cheesecakes, individual cheesecakes, gluten-free dessert, mini cheesecake recipe
Ingredients
For the Crust:
-
1 1/4 cups gluten-free graham cracker crumbs (e.g., Schär Honeygrams)
-
2 tablespoons light brown sugar, packed
-
5 tablespoons butter, melted
For the Cheesecake Filling:
-
2 (8 oz) packages cream cheese, room temperature
-
1/2 cup sour cream, room temperature
-
1 large egg, room temperature
-
1/2 cup granulated sugar
-
1 teaspoon vanilla extract
-
1 teaspoon lemon juice
Instructions
-
Make the Crust:
Preheat oven to 350°F (175°C).
Line a standard 12-cup muffin tin with paper cupcake liners.
Crush gluten-free graham crackers in a food processor or manually in a sealed bag.
Mix crumbs with brown sugar and melted butter.
Spoon about 1½ tablespoons of the mixture into each liner and press down firmly to form the base. -
Make the Cheesecake Filling:
In a large mixing bowl, beat cream cheese until fluffy (1–2 minutes).
Add sour cream, egg, sugar, vanilla, and lemon juice. Beat until completely smooth and combined. -
Bake the Cheesecakes:
Divide the filling evenly among the 12 cups—each should be nearly full.
Bake for 20 minutes or until centers are slightly puffed and just beginning to brown.
Let cool completely in the pan, then refrigerate for at least 3 hours (or overnight) until fully set. -
Serve:
Once chilled, remove the paper liners and top with your favorite toppings.
Topping Ideas:
-
Fresh berries
-
Lemon curd
-
Whipped cream
-
Cherry pie filling
-
Chocolate or caramel drizzle
Notes
Use a cookie scoop to ensure even portions.
Store covered in the fridge for up to 5 days.
Make them ahead—they’re even better the next day!
- Prep Time: 10 minutes
- Cook Time: 20 minutes
- Category: Dessert
- Method: Baking